October 17, 2011

Hakama pants for Halloween

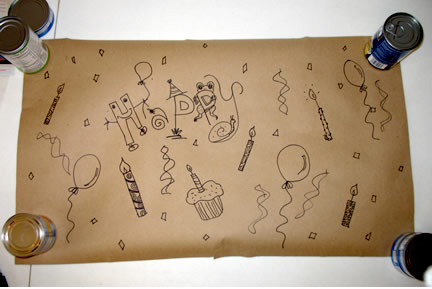
Front of Hakama pleated
but unhemmed
In between another round of severe poison ivy and a terrible reaction to prednisone (case of cure worse than the disease) I manged to make a pair of hakama pants for my daughter's Halloween costume. 

Due to the brain fog from the prednisone it took me 4 days, that's right 4 dang days to figure out how much fabric I really needed. It should have taken maybe 15 minutes. I decided to construct the hakima in traditional Japanese fashion. Since the looms were only about 13-14" wide max, everything was basically made with rectangles. Since my daughter is size extra small I decided to make hers from 10" panels. This makes the layout of pattern pieces on fabric ridiculously easy, unless you are brain fogged like I was and can't add 10 +10. I also used white cotton twill. 

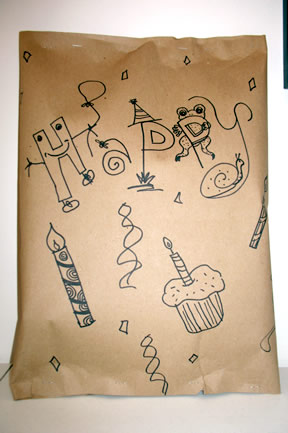
Before pleating, the big girl pants!
There are a few good places to retrieve free instructions and patterns for making hakama. I have noted which ones claim to be historically accurate and if a koshita is included. For some folks this info is really important. All of these links are at the end of my post.

To make the hakama I mostly followed the pattern by Lady Roxannes since it was historically accurate, had good sizing information and the sewing instructions made sense. 

For the koshita I loosely used the measurements from Sithvixen, but used some of the instructions from And Sewing is Half the Battle for the construction of the koshita. To attach the koshita I came up with my own method that made sense to me. I will make another post just for the koshita sizing and attachment since most online instructions seemed to be lacking something for me.

Hakama pleated and  wearing
 her really cool mask
Back side with Koshita
(trapezoid at top of waist)


Grrrr. Attack pose.
My suggestions and experiences
Read all of the instructions and choose the one that makes the most sense to you. I ended up using three different patterns/instructions plus my own. You might find it easier just to stick with one.

When all your pattern pieces are rectangles, there is no need to cut the fabric. Just measure out the width of one rectangle, make a small cut (for me this was at 10"), grab the fabric on either side of the cut and rip away!!! The fabric will rip straight along the grain line and there will be no wonkiness that occurs with using scissors.

One note of caution: to be sure your fabric is on grain, start off with a cut on the edge of the fabric and rip as before. Now you have a straight edge to begin your measuring from. So fun, and even in a brain fog I was able to do this. Also a great activity for when the prednisone has you doing Hulk imitations. Hulk rip fabric! I loved it.

I
roning is your best friend: If you don't iron the seams properly every single time, your pants will look like crap. Seriously that is one thing that separates the professionals from the rest. Iron the seams as you sew them. Here's my quickie instructions for ironing seams.

Lady Roxannes  pattern was great, but the formula for determine were to sew the crotch panel to the front/back did not work for me. Using her formula I ended up with a 7.0" (I used 8") crotch placement, but really needed this to be about 10". So if you are small, I would consider adding about 3" more to this measurement. Hakama crotches sit much lower than modern pants or jeans. Try on the hakama before evening out the legs. You might even consider basting the seams first (extra long straight stitch) to see if you like the placement before overlocking it and then reinforcing it like I did (doh).

One more word of crotch caution: where the crotch seams meet (in front and back) is a trick spot and it is easy to end up with the material all bunched up. Be sure to pin this area and to go slow. If it doesn't look right when pinned, it won't look right when sewn. Re-pin unit it looks good.

Clean your sewing machine! This makes such a huge difference and tends to resolve most issues you are having. There are good sites on the web for doing this. Here is a video on YouTube that I used. Once cleaned you will think you have a new machine. My local sewing shop fees start at $90. Yikes. DIY people, DIY!

Because I was using heavy twill, and multiple layers of it, I thought a jeans needle would work. Wrong. This needle left big holes in the fabric and made popping sounds. Changing to a topstitch needle solved those issues. 

If you decide to do the hakama, I hope you find these suggestions and links helpful. It really is easier than it sounds.

The hakama turned out nice and she is pleased with them. Next up....how to make koshita.

Links to free Hakama patterns and instructions.
  1. AnneLiese's Fibers and Stuff: She gives directions for making men's and women's hakama as well as a kimono. If you do not sew, this may be a confusing tutorial for you to follow. Pattern pieces are not traditional panel widths. The pattern lacks a koshita (back brace)
  2. Sithvixen: This link brings up the pdf tutorial. This pattern is much simplified and has a pattern for making the koshita (including sizing the koshita) with a simple means of attaching it, however the back seam is exposed on the inside of the pants and could cause chaffing. There are better methods for koshita attachment that will hide seams. Not historically accurate.
  3. Piner Aikido: another pdf tutorial. Super simplified. No koshita, not historically accurate.
  4. Lastwear on Deviantart.com: If you are not a sewer then I do not recommend this one as it is the most complex pattern I have seen so far. If you use this one be sure to read through all the pages of comments to find the sizing chart and pattern pages. Not historically accurate, but includes a koshita and a pocket. Nice design.
  5. Lady Roxannes on http://www.yamakaminari.com: This is the pattern that I followed. Great explanations and sizing information! Highly recommend this one, even for inexperienced sewers. No koshita.
  6. And Sewing is Half the Battle: Great tutorial. Includes a koshita, but lacks instructions for sizing and the sewing instructions are confusing. Historically accurate

October 3, 2011

So after much studying I was finally down to the business of crafting. Yesterday I worked on two projects that I will split into two posts.

Friday I posted a tutorial for tabi socks that I made for my geta shoes. Well, one pair of tabi just isn't enough especially now that it is rainy and really cold here.

I do have to warn you that when you make tabi you now have a left and a right sock. If your tabi pairs are each a different color you won't have to worry about matching them up. But if you did a bunch in the same color..guess what...that's right it's a little more work for you on wash day.

My daughter and I gathered all the socks that we wanted to turn into tabi style. I think I did about 8 pairs of socks and it only took about 30 minutes because I was having sewing machine issues. I am going to show you the Halloween tabi socks that we made. They are so cute. If you go to one of the cheapy stores you can get a pair for a $1 to play with.

Her skeleton tabi are going to look great with the waraji sandals she made for her Halloween costume.

Did I mention that tabi are comfortable to wear? They are. I remember when I was a kid there were those socks with all the separate toes--couldn't stand to wear those. The tabi toe does not add bulk in your shoe and they look wild.

So be bold, be crazy and go tabi!!

September 30, 2011

How to make Japanese style tabi socks

So yesterday I got a fabulous surprise in the mail! For my birthday I ordered geta 下駄 from Japan and they came about a week early. I am happily wearing them now.
Geta are Japanese wooden clogs that make a wonderful sound when you walk in them. They look like platform flip flops although I cringe at using the word flip flop when comparing them to the beautiful geta. Although it seems that geta are just as casual to the Japanese as flip flops are we Americans. Geta can be worn with or without tabi -- Japanese socks that have the big toe separate from the rest of toes. These are also worn with the waraji  わらじ sandals I made in my last post.

This is what happens to you when you start to watch anime or at least me. Because of my desire to understand anime without translations or dubbing, I am teaching myself to be literate in Japanese and have desire to learn more about the culture. Wearing the traditional clothing and consuming the food of another culture I think is helpful in gaining a deeper appreciation and perhaps an affection for another country.


Tabi or 足袋 are super easy to make when you start off with a sock. I have not tried to make them from "scratch", but I am sure I will tackle that too. Stay tuned.

Materials/Supplies

  • pair of socks - any kind you like that look nice because you want to show them off.
  • chalk to mark the socks or hell a sharpie works--just use a thin one.
  • thread to match or close enough -- since the seam is between your toes who is going to go looking there?
Tools
  • sewing machine or hand sew these if you prefer.
  • good scissors
Construction:
  1. Turn your socks inside out and put one on each foot
  2. Spread out your big toe from the rest of your foot
  3. Mark the area in between the big toe and second toe with chalk, sharpie or whatever. Be sure to follow the curve of the big toe so that it doesn't end up with an SNL "cone head". (see pics)
  4. ***If you do both socks at the same time you will not have to worry about ending up with two left socks or two right socks. Here is why: once you turn the sock inside out and put it on your right foot and then sew on the marking line, it now becomes the left sock when turned to the right side. I knew this and still ended up with two left socks. Doh!! Marking then simultaneously solves this issue nicely.
  5. Time to sew along both sides of the marking line leaving space for your scissors to cut (about 1/8"). First start with the straight line (back stitch at the beginning). When you reach the end back stitch again and then make the turn to start up the toe side by making only one stitch that is at a 90 degrees to the stitched line. Back stitch the one stitch to reinforce it. Now start sewing up to the tip of the toe rounding the corner and back stitch again. Easier to do than describe I promise!
  6. Scary part: cut between your stitched lines being sure to also cut the curve from the toe. Do not worry about clipping seams.
  7. Turn inside out and put them on. Don't you look cool!


Let me know if you tried this and how marvelous your tabi turned out. Try this with unusual socks rather than just plain ones for something extra wild.

September 25, 2011

Boozy Cantelope Sorbet

How's that for a title? I had a cantelope that I let sit on the counter for too long. It was sweet and tastey, but too soft. So I started looking for a recipe too use it in.

The sorbet promised too be easy, without sugar, and used gin to keep out from getting rock hard. So I threw it all in the blender with some orange jest and a little honey just in case. For hours later it looked yummy.

Scooped some up for my daugherty and I and....."Mom, did you put zest in. here?"  Yes, I Did. Do you like it? "Uh, you better taste it" she says with a twisted up face.

Ugh. Idk. Was it the gin or the orange rind? Nasty nasty stuff. We even doused it with honey to see if that helps. Sadly no.


September 24, 2011

Halloween costume Shinigami, Arrancar Hallow or Espanda?

What do you want to do for Halloween? Are you dressing up? "Well Mom" she says, " I want to be......." So what part did I hear? LOL. The shoes. And not just any shoes, I did my research. We are going to make Japanese waraji. In case you haven't guessed it from the title we are Bleach fans. (No not the nasty stuff in the bottle, the fun Japanese anime on the net.)

While she is working on her mask (leaning more towards the Espada characters at this point.), I am in charge of wardrobe. Today we tackled the waraji which are traditonal footwear  of the soldiers, commoners, and travelers. This is a good article about the waraji. Apparently travelers measured the distance they traveled on long journeys by the number of waraji they used.

Waraji were made of rice straw, but since Home Depot doesn't do rice:
  • we used sisal rope 1/4" (10' per sandal) and 
  • jute thin stuff (1 pack made 1 pair of shoes but you may need more depending on your foot) 
  • We also bought a scrap plank of wood 4ft x 12" wide x 1" thick for a dollar.  For our looms we had the wood cut down to 20" in length. We are 7-7.5 shoe size if that helps you in figuring out what size loom to make. Bonus: the Home Depot guy cuttin my wood was smokin hot! Yummmy.
  • My own tip here: keep the hammer handy because the nails loosen up quit a bit as a result of the weaving process. And..uh... take the loom off your knees before resetting the nails. Doh!
  • Total cost per pair of shoes: $7.00. Love it.

There are plenty of tutorials on the web and here are two that we found useful. This one gave directions for a homemade loom:

Make your own cosplay Bleach sandals on Instructables


We found this tutorial good for making the loom  and for the actual weaving (easy easy easy to do): 

How to make you own sandles for Bleach Cosplay on Youtube.
 
I recommend watching the series (3 vids total) at least once all the way through to pick up on all the great tips she gives.


Here are the pics from our adventure.
Ta da! Waraji. And very comfy.


So how did we do? It was fun. We really enjoyed the process and are very happy with our waraji.


September 22, 2011

Forgive me, I have not blogged the crafting.

Wow. Has it really been that long ago? April?? Really? Oh well, I am back now.

The last thing I remember crafting before dropping out of sight or blog land are the accessories for my daughter's Jr. prom. She didn't want me to post it on the web until after the prom. That was back in May? Hmm. ..piss poor excuse to show up again in September I know.

Making her accessories was so much fun because she didn't go with the typical HS prom outfit. She wanted to be herself which is very artsy and smart. Her personal theme was steampunk and boy did she rock it!!


Together we made her facinator, even  the top hat portion. A combination of sewing and gluing did the trick. Added some feathers, a playing card, and red ribbon to match the corset. There is even a skull bead among the feathers.

Speaking of the corset, there is a tank worn underneath it. Since the thin straps did not go well with the look, we added black lace to the straps and the front portion. It went from plain, to dramatic.


The earrings were made from sale parts I found at JoAnn's Crafts and so was the black center piece for the necklace. The beads and long red crystal were re-purposed from an old pair of my earrings.

The choker was made from some black brocade that I had (tag sale find) and I just threw on a clasp for the back. That too had little red crystals hanging down the back.


Lace from a spool as well as fabric lace were used to make the fingerless gloves. Embarrassingly easy to sew. Just trace the hand and sew it up the side. Doubling over the fabric prior to sewing the glove resulted in a better looking lace pattern and a "pocket" to put in the red ribbon.

Now here is a confession. All of the close up shots in this post were cropped from other photos because I didn't even take close up shots of the accessories. Doh!

Wait till you see what we are going to make this weekend for her Halloween outfit.

Mata nā!

April 10, 2011

365/ 61 & 62 Starfish Pillow Birthday Gift

What a week! Work was crazy and for a time so was I (more than usual). BUT...I found time to be creative and that saved me. The last couple of days (Tues/Sat/Sun) I have been working on a special gift for my friend Ken. It was his birthday and I wanted to do something really nice. 

A few years ago he pointed out a starfish pillow that he really liked. That memory is the inspiration for the Starfish Pillow I made him.

The front of the pillow sports a partial wool felt starfish. Figuring out how big to make the starfish and where to center it was a challenge. This pillow is 20" square, so I had to tape sketch paper together to get a proper sized template. 

I divided the paper into thirds (horizontally and vertically) so that the design would be off center and still look good.
Do you like my fabric choice? It is from my generous friend Amy who didn't know what to do with it or even know why she had it. We agreed that it was a terrible minty green color. However, 10 minutes with my pal Jacquard Dye-Naflow and wha-la: a gorgeous beach inspired fabric perfect for the Starfish Pillow. I am telling you changing the fabric color could not be easier! I was shocked and delighted with the new colors.

No less challenging for me was the back of the pillow. I went with an envelope closure, but the math to create it always messes me up. Yes I know, I mess up the math. Math is perfect. Before childbirth: math wiz...after childbirth: dunce.

Ooooopsie not enough painted fabric for the back, so what do I do? Add in more from the stash that matches the starfish on the front. Lucky for me that was white. It turned out nicer with the two colors. A happy accident. I was also more daring with the fabric color on the back so it has "rusty" areas too.

Here is a close-up view of the starfish. I used different colors of DMC and other flosses to create the bumpy texture on the arms. I used  pinkish-grays, peach tones and a peach variegated floss. Recognize the knots? French of course. I got really quick at doing the French Knots. This was the most relaxing part to do.

This is how it would look on my bed if I had made one for me too. Actually, I just might do that.

For now I am entering my pillow in the Blogger's Pillow Party. Click the graphic below to visit their site for details.


Blogger's Pillow Party

April 8, 2011

365/61 How to Make Tropical Yogurt

Belated Post for Tuesday, April 8th

I have finally gotten back to cooking healthy and eating lots of fruits and veggies. What I have discovered is that I don't do well when I have lots of bread or flour based foods. Bready carbs make me sleepy, sluggish and give me lots of heart burn. Does this happen to you too? Some people can tolerate them well, but I need to keep my consumption of them low. 

I have also been trying to cut out white sugar so I no longer eat milk chocolate but have switched back to the darkest chocolate I can find since it tends to have a much lower sugar content. My favorite is the Extra Strong Dark 77% Chocolove Bar..mmmm. love bar. I lie. I am a chocoholic and will eat the milk, but have been feasting on  the dark stuff instead and the 77% is yummy and smooth.

So what does this have to do with yogurt? I used to eat my plain yogurt with a little granola, chocolate chips, and honey on top. I just created a recipe for making a much better and healthier version that I now crave!

Tropical Yogurt
  • Plain low-fat or non-fat yogurt (has no added sugar)
  • cut up cantaloupe or seedless grapes cut in half or hey...both
  • 1/2 to 1tsp of Coconut Nectar or raw honey
  • 1 Tbs finely grated organic coconut flakes (without sugar)
  • 1/2 oz or 4-5 big walnut halves broken up
  • 1/2 Tbs bittersweet chocolate chips (I use Ghiradelli 60% and cut them in half because they are ginormous)

Place yogurt into your favorite bowl and top with the Coconut Nectar. Give the yogurt a light stir --- just enough to swirl the nectar around, but do not completely mix the two. Next add in the fruit, coconut, chocolate chips and finally the walnuts. 

This has become my favorite breakfast and snack. I prefer crunch in my yogurt and this recipe provides that. If you are following the Weight Watchers Points Plus Program then this is about 5 points. Give it a try, I think you will really like it. Let me know what you think.

April 5, 2011

365/60 Easy Face Moisturizer

Belated posting for Monday, April 4, 2010

I have been reading about the benefits of organic coconut oil and coconut milk and how great it is for your health. Just Google it and you will see. Anyway, I finally broke down and spent $8 on a 8oz jar. It smells wonderful and is great to cook with.

However I found another fabulous use for it. My face! I have tried lots of different moisturizers with no positive or lasting effects. For the last few years my face has been so dry and flaky and nothing seemed to make an impact.

I have a simple recipe that I have been using for four days now. Normally I would have to scrape off the dry spots/flakes before moisturizing every morning--ick. After only four days of using coconut oil, my face looks the best it has in a long time with very little to no flaking. There is no greasy residue when applied lightly. I have used less than a teaspoon so far, so an 8oz jar would last an incredibly long time. This makes Coconut Oil the best moisturizer I have used and the least expensive! And...I can eat it. LOL.

Coconut Oil Moisturizer
Ingredients: Organic Coconut Oil

How to Use:

  • Transfer one TBS of Coconut Oil into a small container (like those used for salad dressings when ordering take-out...mmm take-out)
  • After showering rub finger over coconut oil to soften it and apply all over face. It only takes a very small amount!
OR:
  • Clean face with Witch Hazel to moisten and clean it, then apply small amount of Coconut Oil to face
For really dry or flaky skin like mine:
  • Apply facial scrub (Depending on your dryness you might do this 2-3 times a week)
  • Apply small amount of Coconut Oil to face.
  • As the dryness and flakiness clears up, there will be less need for the facial scrub.
  • On non-facial scrub days clean face with Witch Hazel to moisten and clean it, then apply small amount of Coconut Oil to face.
It is so simple and works so well. Let me know if you try this and if it worked for you.

356/58 & 59 Making Headway in Embroidery of Quilt

I have been doing data intensive consulting work, so after a day of that I really haven't been into spending more time on the computer. But today is blog catch up day.

Well, I am finally making some good progress with the embroidery of my Dead Parrot Pirate Quilt. Although I would like to be quicker at it, I find that I really am enjoying the process. Its very relaxing--when I'm not ripping out stitches. My hope is that by the time I have embroidered my way back up to the first "Yo" that I will be motivated by my new skills to redo that "Yo". It at least deserves an "o".

Here is a photo of my efforts from Saturday and Sunday night.


The Close Up

March 31, 2011

365/ 56 & 57 Of Pirates and Best Friends

Saturday I got a call from one of my most favorite friends whom I do not get to see enough. My dear friend Kathy Hart had a solution to my problem with embroidering text onto the backside of my Dead Parrot Pirate Art Quilt. Kathy is one of those amazing people who sees something, wants to make it herself and does it--and does it very well. Totally fearless and awesome gal!!

So she called me to tell me exactly what I needed to do in order to get the embroidery looking good. Just from looking at the picture on my blog, she could immediately tell that I was using too many threads. The DMC floss can be pulled apart so that you have six strands. My thinking was, hey this will go quicker if I use it as is, nice and thick. Wrong. Kathy knew that. 

Kathy also said that my stitches were going the wrong way and that I should outline stitch the letters and then fill them in with satin stitch--but those stitches needed to be horizontal and alternate the lengths within each row. I love it when my friends have the answers I need!

Here is the before:
Before: 

I also decided to embroider on top of Sulky Light Tear Away Stabilizer. First I traced the letters onto the stabilizer and then temporarily sewed the strips onto my quilt with a running stitch.  Here is my sampler I did after I talked with Kathy:
  After:


Much better. From the sampler I also learned that it was better to do the outline stitch then remove the stabilizer prior to filling in the letters and skull with satin stitches. The sampler looks fuzzy because I didn't remove the stabilizer until after I was done with the embroidery. It's very difficult to all remove that stuff from under the stitches. 

Close up of the skull prior to embroidery on the stabilizer and after I removed it:


Feeling like maybe I knew what I was doing, I moved onto the quilt back and got all of the stablizer sewn on. It's much different trying to do embroidery on a quilt. I learned that my stitches were much too loose and have redone the "Y" in Yo three times now. And the "o" is missing. I have decided to continue with the rest of the quilt and will finish up that first "Yo" last. 

Here is my progress as of last night:


March 28, 2011

365/55 Upcycle Wrapping Paper Insert Tutorial

This one I made for the tut
Yesterday my daughter and I were busy wrapping gifts for my Mom, niece and brother. My brother really wanted lots of socks, so that is what I got him. What is really cool about his gift is the impromptu way that we wrapped it. I liked the idea so much that I thought I would make a tutorial to share. And he liked the gift wrap so much that he kept it.


Below is the, but if you want to download it for later here the is pdf:


Making wrapping paper out of the thin wrapping paper insert (WPI) that is in the middle of rolled wrapping paper is easy, a fun family activity, saves money and is a great way to upcycle materials in your home. WPI is great for odd shaped gifts, bulky items or those with sharp edges that might rip regular wrapping paper.


Supplies
WPI tube
  • wrapping paper inserts (WPI) from the middle of wrapping paper rolls (these rolls are made of thin card board rolled up, not the traditional card board tubes)
  • sharpie, crayons, markers, paint, stickers or whatever medium you feel comfortable with or have in your home--no need to buy anything. In fact don’t buy anything. The challenge of using what you have on hand is part of the fun.
  • stapler
  • regular or colored staples
  • scissors
  • your imagination or a child who likes to draw

    Step 1:  Remove the WPI from the wrapping paper roll and unroll it. You want the WPI to curl up over your gift, so decorate the opposite side. If the WPI is curling up, then turn it over so that it can be flattened slightly.  I am holding mine in place with cans.
Step 2: Most of the paper rolls are brown, so in order to use light colors paint the roll first with white acrylic paint or gesso. Allow WPI to dry. Or love it for what is and proceed to Step 3.

Step 3: Decorate your WPI. Use a black sharpie or dark marker to create multiple images with a common theme like balloons, birthday cake, candles, words, happy faces, doodles, laughing chickens or perhaps a hint as to what is inside. Get fun and funky with your WPI! Children have a great time with this part and the bonus gift is their artwork. I have an Uncle who kept a large paper bag that I decorated for his gift  many many many years ago.
Step 4: The black sharpie looks great all by itself or you could opt to color in your images or words with crayons or paint.

Time to wrap your gift with your new wrapping paper.
  • Place your fun and funky WPI  on a flat surface with the design facing away from you.
  • If necessary, cut the WPI to size if it is too large.
  • Put your gift in the center of the WPI.
  • Fold over 2 edges of the WPI so that they overlap each other and it cover the gift.
  • Staple the WPI where the edges overlap. Just go as far up as the stapler lets you. It does not take many staples to get the job done.
  • Now staple across the bottom edges to close up the ends being careful not to put a staple in the gift.


Your gift is now secure inside and looks great! Because this stuff is sturdy, you can save it to use for the next gift--if they let you have it back.

Notes: I would not use this type of wrapping for a very young child due to the staples.

What to make your gift snarky? Use duct tape instead of staples to wrap it up--all over. Kids will giggle and roll on the floor at the silliness and won’t even care about what is inside. Now you have given them a fun memory as well as gift. 

Let me know how you liked the tutorial. To share the tutorial please use this link:http://creatibus.blogspot.com/2011/03/36555-upcycle-wrapping-paper-insert.html

March 26, 2011

365: 53 & 54 All Wired Up

"I do believe there come a time when everything just falls in line, We live and learn from our mistakes...."

Great song eh? I really do have shameless fun creating my blog titles. But ya know, that song fits the craftivity I started last night perfectly. Last night my efforts sucked and looked hopeless, this morning -- you shall see. It all started with my Mom...of course it did. I promise this is not a therapy posting. lol.

It was Mom's birthday at the beginning of the month and my brother's and my niece too. Jeez. So what to do? Well if you have been reading my blog (thank you again for your lovely comments and encouragement!) you already know that I made my niece a really pretty wire frame and bead necklace

Mom said she wanted me to make a Pandora style bracelet and green. Thanks Mom. Although I make lots of different kinds of jewelry from some strange stuff like milk jug plugs, I am not glass bead maker. Ya okay that one class I took doesn't count and those beads would drag King Kong's neck to jungle floor. Being a Suze Orman follower, I decided to make do with what I had. I am an artist and up for the challenge.

A week later I had the answer. I really liked my niece's bday necklace so why not make something similar, but as a bracelet for dear Mom. Ya that's the ticket. I dragged the needed tools, beads, and wire to the couch... a terrible workbench to be sure. I made everything: wire frames, jump rings and clasp, but not the beads.

Don't show Mom this until after Sunday, that's when everyone gets their belated present. Here is her bracelet:
End link and clasp
 
Center Frame


The artsy view.