 |
| This one I made for the tut |
Below is the, but if you want to download it for later here the is pdf:
Making wrapping paper out of the thin wrapping paper insert (WPI) that is in the middle of rolled wrapping paper is easy, a fun family activity, saves money and is a great way to upcycle materials in your home. WPI is great for odd shaped gifts, bulky items or those with sharp edges that might rip regular wrapping paper.
Supplies
 |
| WPI tube |
- wrapping paper inserts (WPI) from the middle of wrapping paper rolls (these rolls are made of thin card board rolled up, not the traditional card board tubes)
- sharpie, crayons, markers, paint, stickers or whatever medium you feel comfortable with or have in your home--no need to buy anything. In fact don’t buy anything. The challenge of using what you have on hand is part of the fun.
- stapler
- regular or colored staples
- scissors
- your imagination or a child who likes to draw
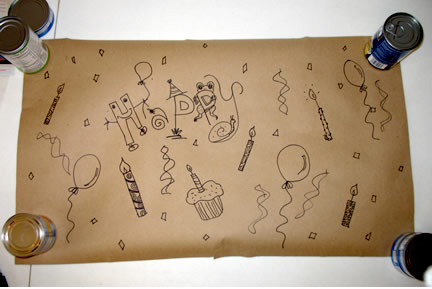
Step 1: Remove the WPI from the wrapping paper roll and unroll it. You want the WPI to curl up over your gift, so decorate the opposite side. If the WPI is curling up, then turn it over so that it can be flattened slightly. I am holding mine in place with cans.
Step 2: Most of the paper rolls are brown, so in order to use light colors paint the roll first with white acrylic paint or gesso. Allow WPI to dry. Or love it for what is and proceed to Step 3.
Step 3: Decorate your WPI. Use a black sharpie or dark marker to create multiple images with a common theme like balloons, birthday cake, candles, words, happy faces, doodles, laughing chickens or perhaps a hint as to what is inside. Get fun and funky with your WPI! Children have a great time with this part and the bonus gift is their artwork. I have an Uncle who kept a large paper bag that I decorated for his gift many many many years ago.
Step 4: The black sharpie looks great all by itself or you could opt to color in your images or words with crayons or paint.
Time to wrap your gift with your new wrapping paper.
- Place your fun and funky WPI on a flat surface with the design facing away from you.
- If necessary, cut the WPI to size if it is too large.
- Put your gift in the center of the WPI.
- Fold over 2 edges of the WPI so that they overlap each other and it cover the gift.
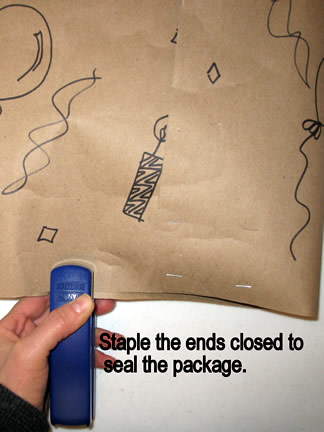
- Staple the WPI where the edges overlap. Just go as far up as the stapler lets you. It does not take many staples to get the job done.
- Now staple across the bottom edges to close up the ends being careful not to put a staple in the gift.

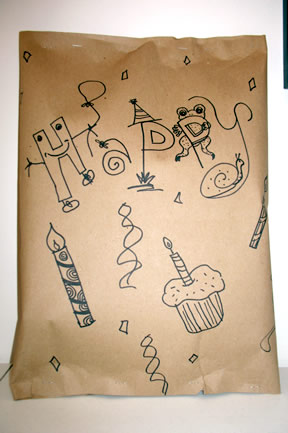
Your gift is now secure inside and looks great! Because this stuff is sturdy, you can save it to use for the next gift--if they let you have it back.
Notes: I would not use this type of wrapping for a very young child due to the staples.
What to make your gift snarky? Use duct tape instead of staples to wrap it up--all over. Kids will giggle and roll on the floor at the silliness and won’t even care about what is inside. Now you have given them a fun memory as well as gift.
Let me know how you liked the tutorial. To share the tutorial please use this link:http://creatibus.blogspot.com/2011/03/36555-upcycle-wrapping-paper-insert.html
No comments:
Post a Comment